Streamline Customer Communications: Automate Statement of Accounts Emails in Dynamics 365
Introduction
Sending statement of accounts emails to customers on a monthly basis with custom criteria is a critical task for maintaining clear and transparent financial communications. In MS Dynamics 365 Finance and Operations, you can streamline this process by configuring a table-joined filter to ensure that only customers with a balance greater than 10 are included. This blog will guide you through the prerequisites, configuration, and scheduling of automated monthly statement emails.
Prerequisite Setups
1. Configure/Verify Email Parameters
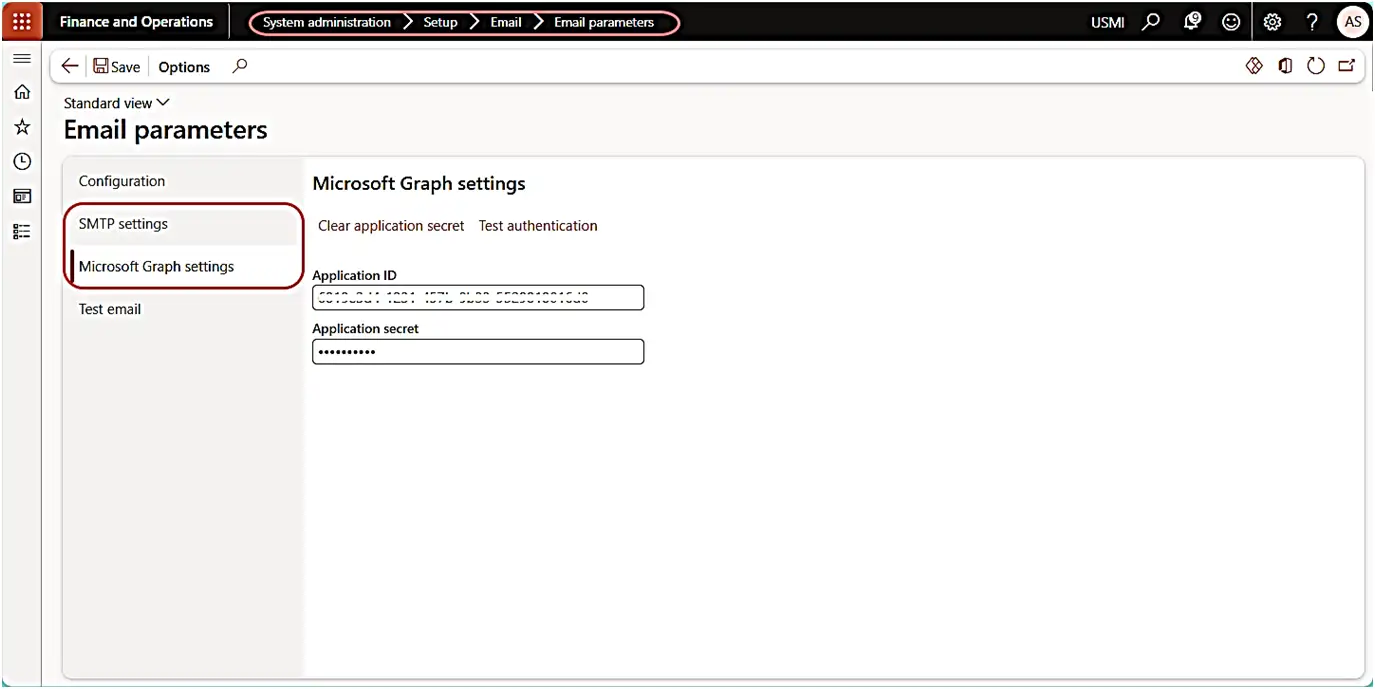
Configuring email parameters ensures that the system can send emails correctly. This involves setting up the SMTP server details and the default sender email address.
- Go to System Administration > Setup > Email > Email Parameters.
- Verify the Graph/SMTP server details and default sender email address.
2.Set Up Customer Email Addresses
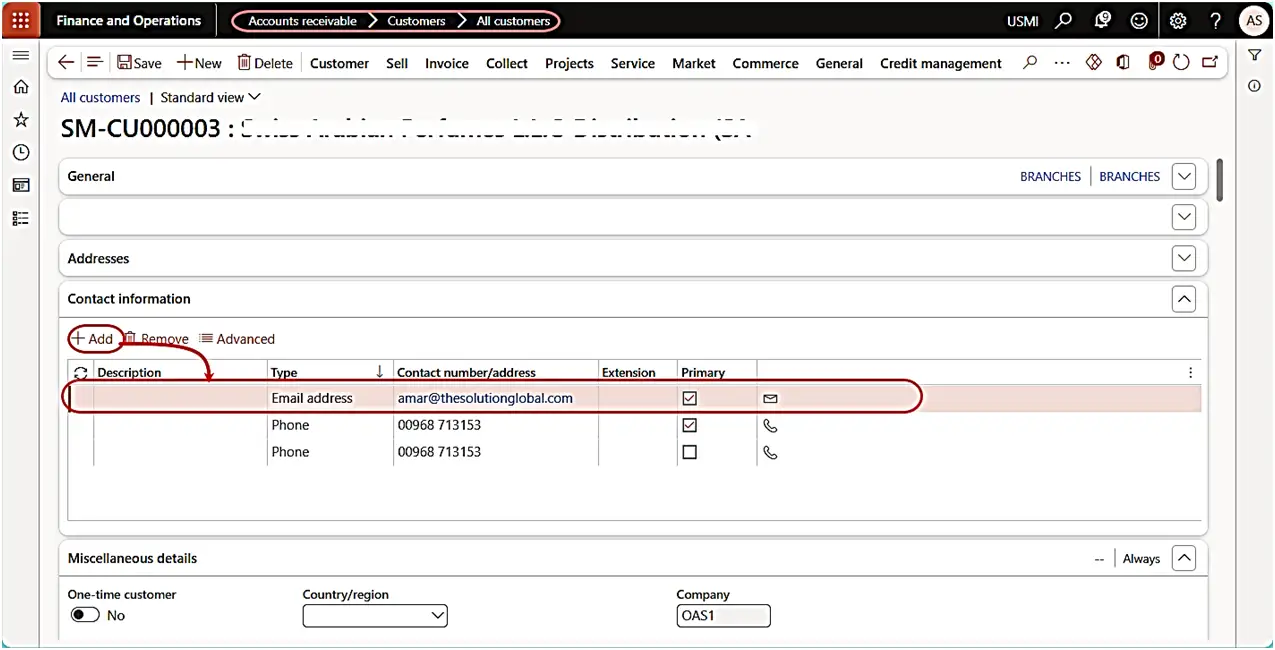
Ensuring customer email addresses are correctly entered and classified ensures that statements are sent to the correct recipients.
- Go to Accounts Receivable > Customers > All Customers.
- Select a customer and go to Contacts.
- Ensure the customer’s email address is entered with Type = email, Purpose = Business, and Primary = Yes.
3.Configure Customer Balance Statistics
3.1 SCHEDULE BALANCE CALCULATION BATCH JOB
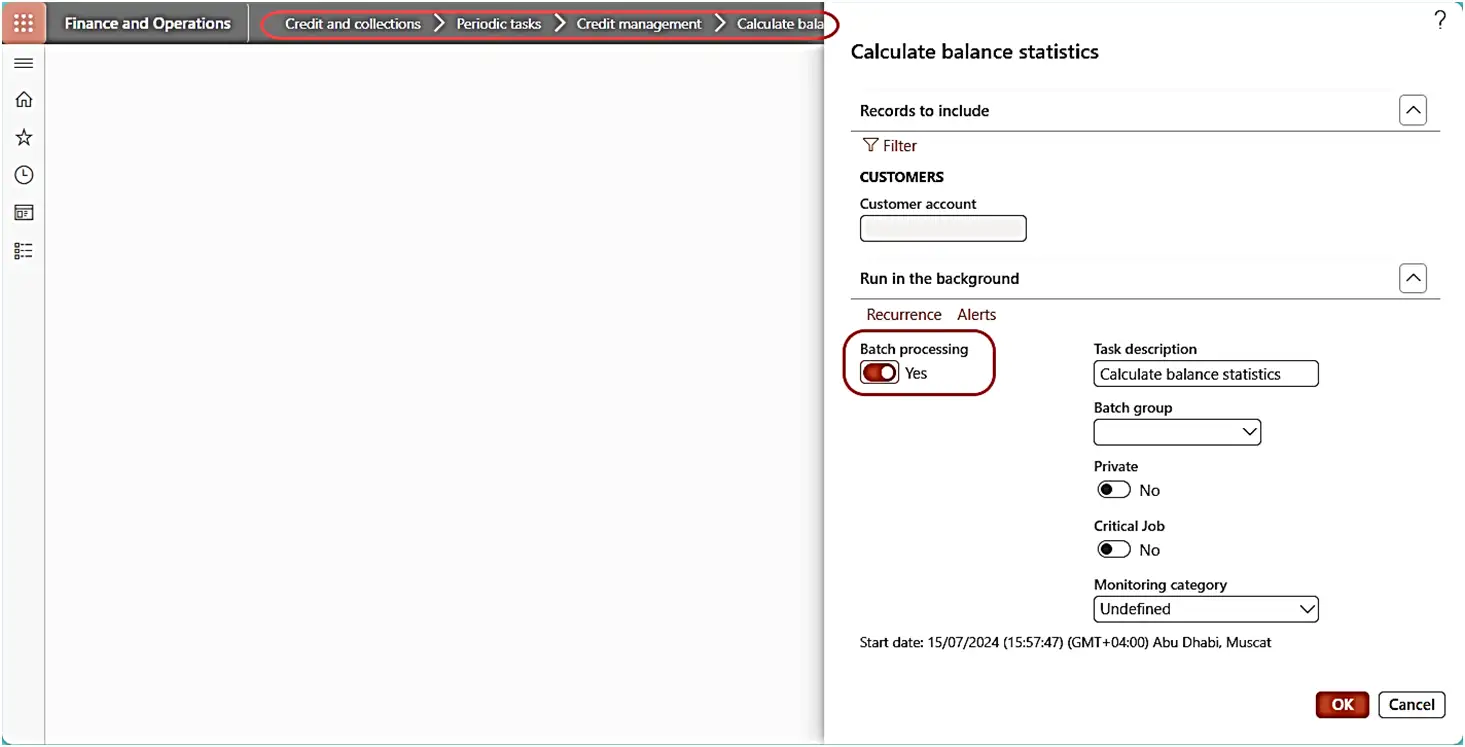
Automating the calculation of customer balance statistics ensures that the data is up-to-date and reduces manual workload.
- Go to Credit and collections > Periodic tasks > Credi management > Calculate balance statistics.
- Create a new batch job for calculating customer balance statistics.
- Set the recurrence to match your reporting needs, such as daily or weekly.
3.2 SET UP CUSTOMER BALANCE STATISTICS
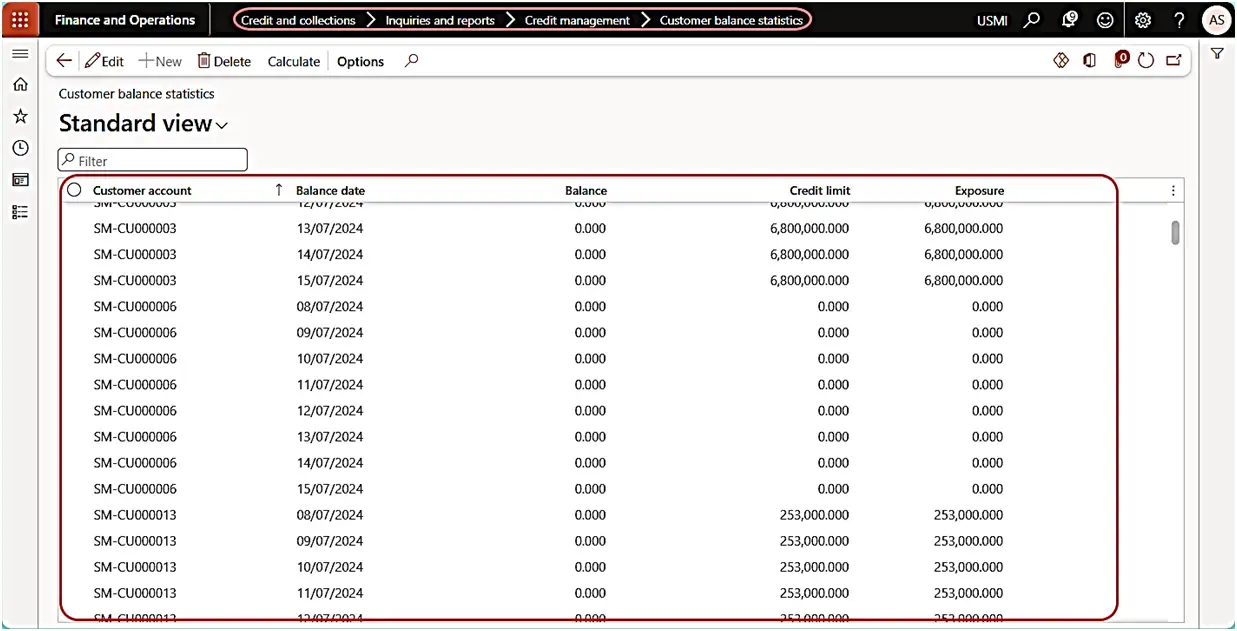
Once you set calculate batch job, Customer balance statistics provide a detailed view of customer balances.
- For review, go to Credit and collections > Inquires and reports > Credi management > Customer balance statistics
Setup and Run Statement
1.Setting Date Criteria
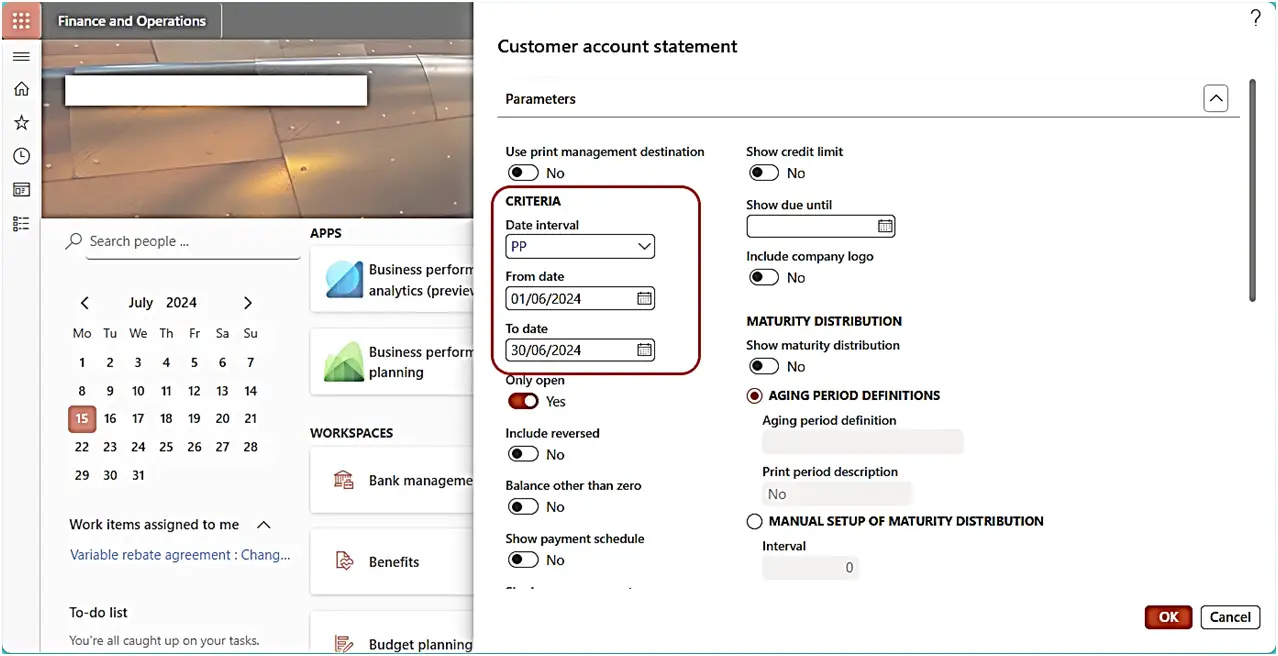
Specifying the date range ensures the statements are generated for the correct period.
- When generating the customer statements, enter the required From Date and To Date on the customer account statement report parameter setup form. Go with the date interval defined Previous period if sending in first days of the month. Select Current Period if sending emails on last day of the month.
2.Configure Print Destination Settings
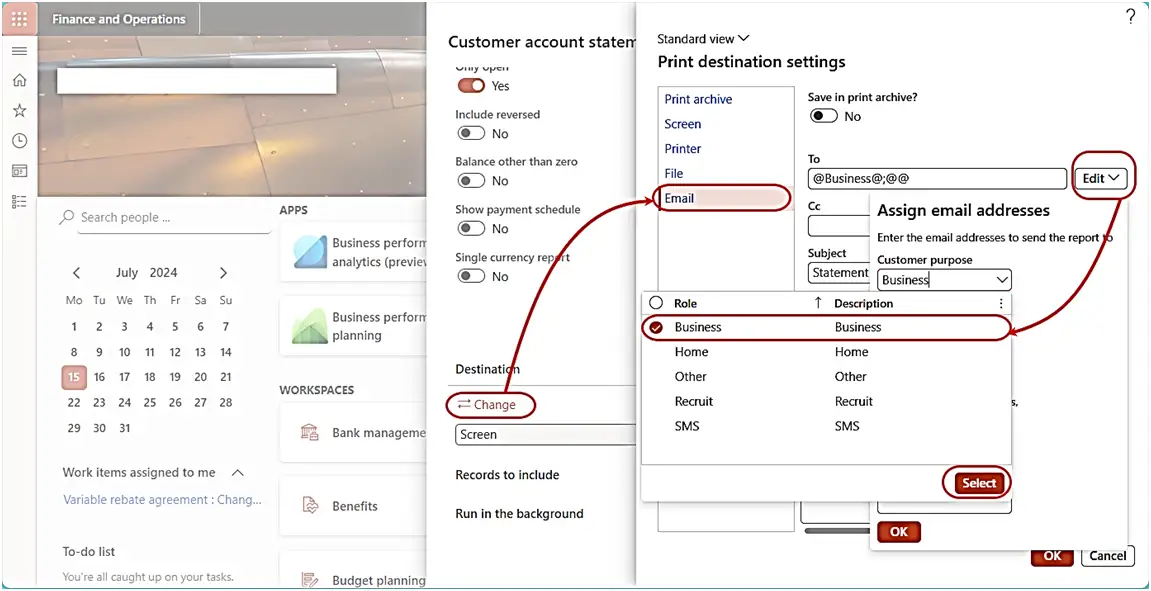
Print destination settings determine how and where the customer statements are sent, ensuring they are emailed instead of just displayed on the screen.
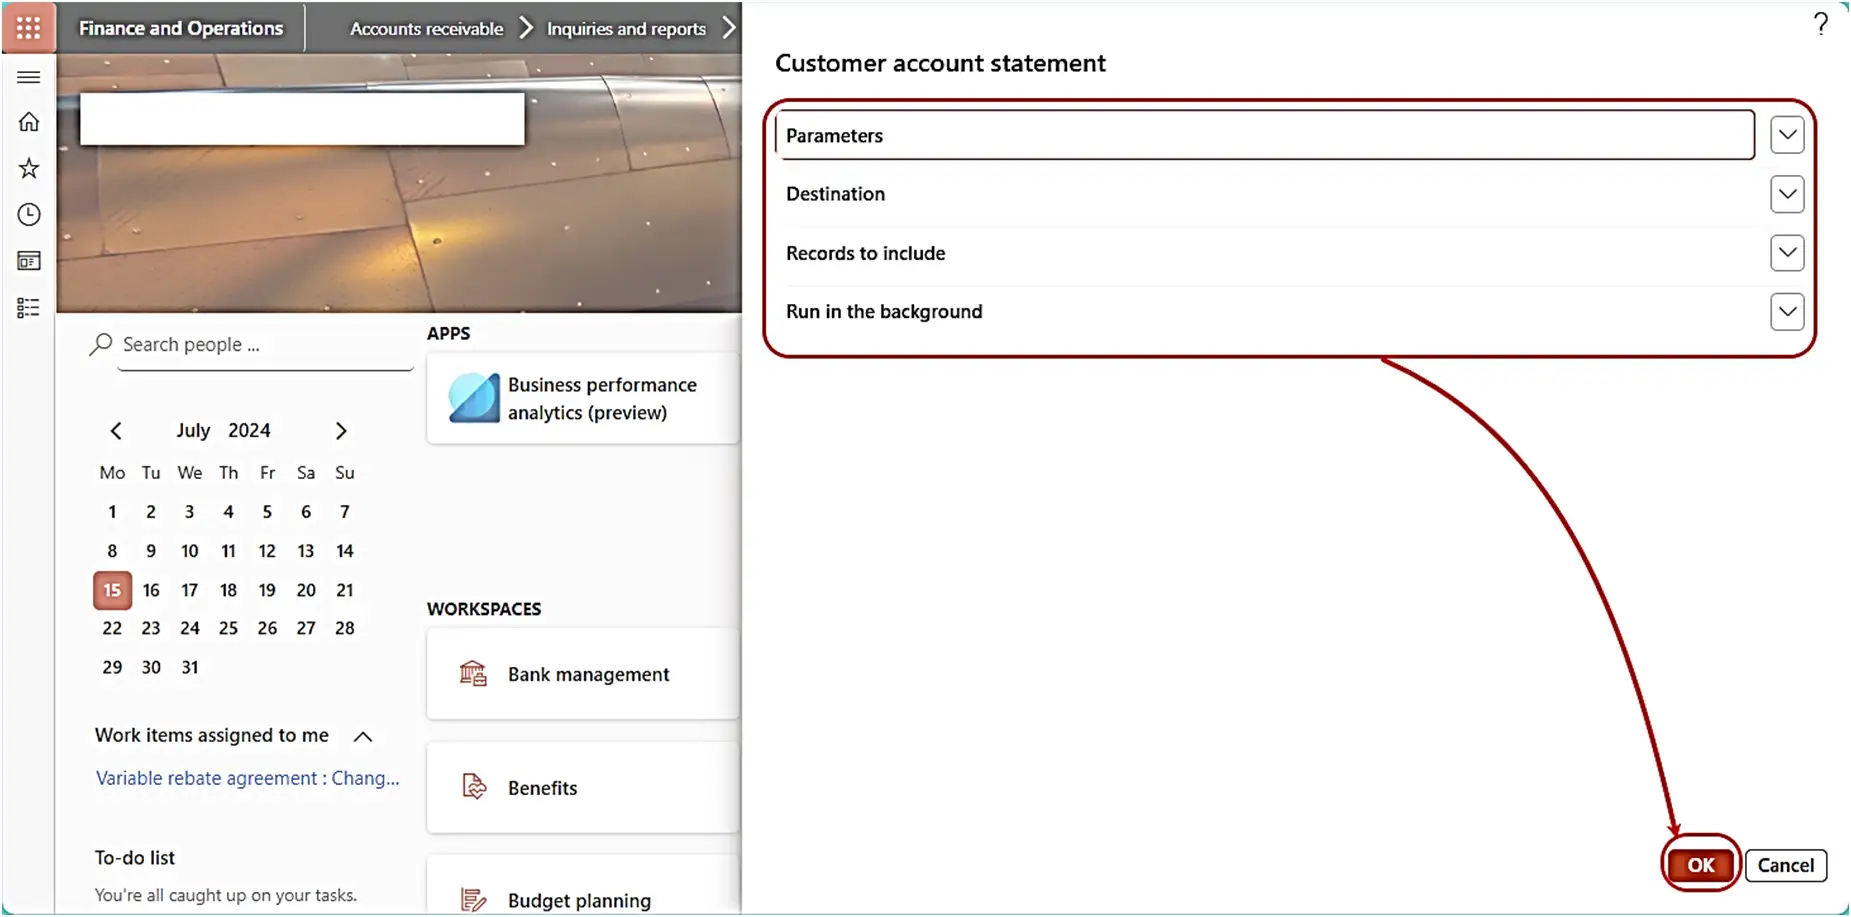
- On the customer account statement parameter setup form, change the destination from Screen to Email.
- Enter the required subject, select the file format (PDF), and enter the required email body details.
3.Adding Table Join and Setting up the Filter
Step-1: Open Filter Options
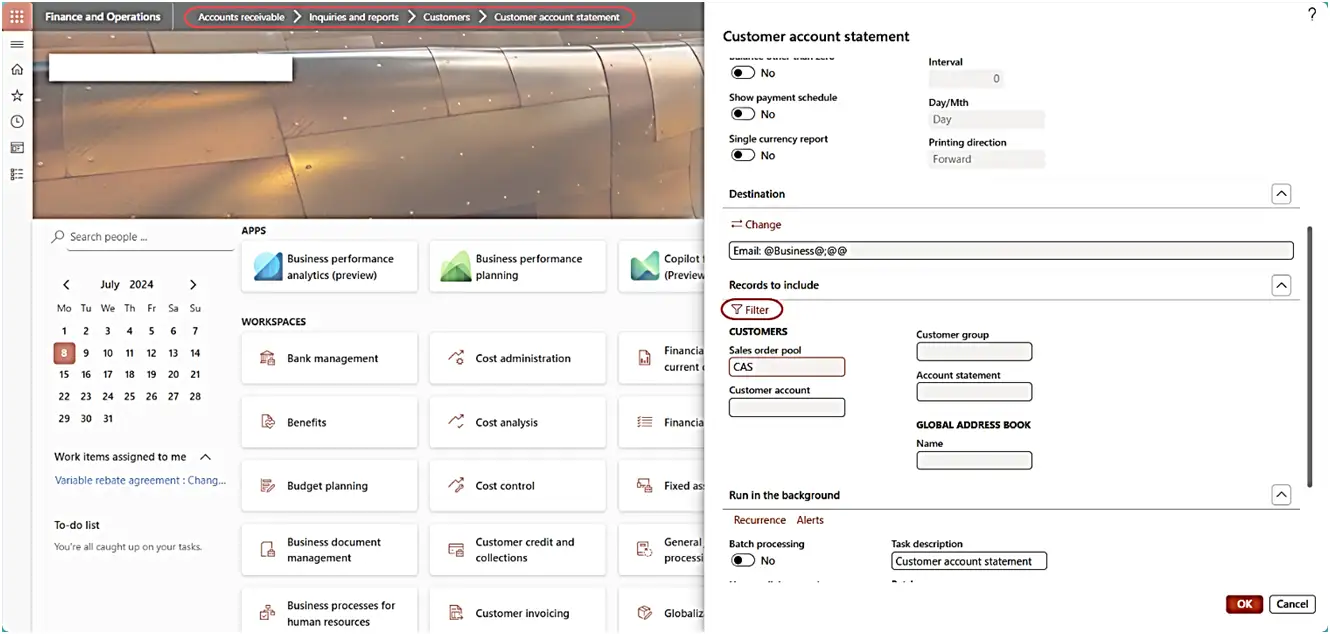
Filtering options allow you to refine which customers will receive statements based on specific criteria.
- Click on the filter icon from records to include section to open the filtering settings.
Step-2: Open Advanced Filter Options
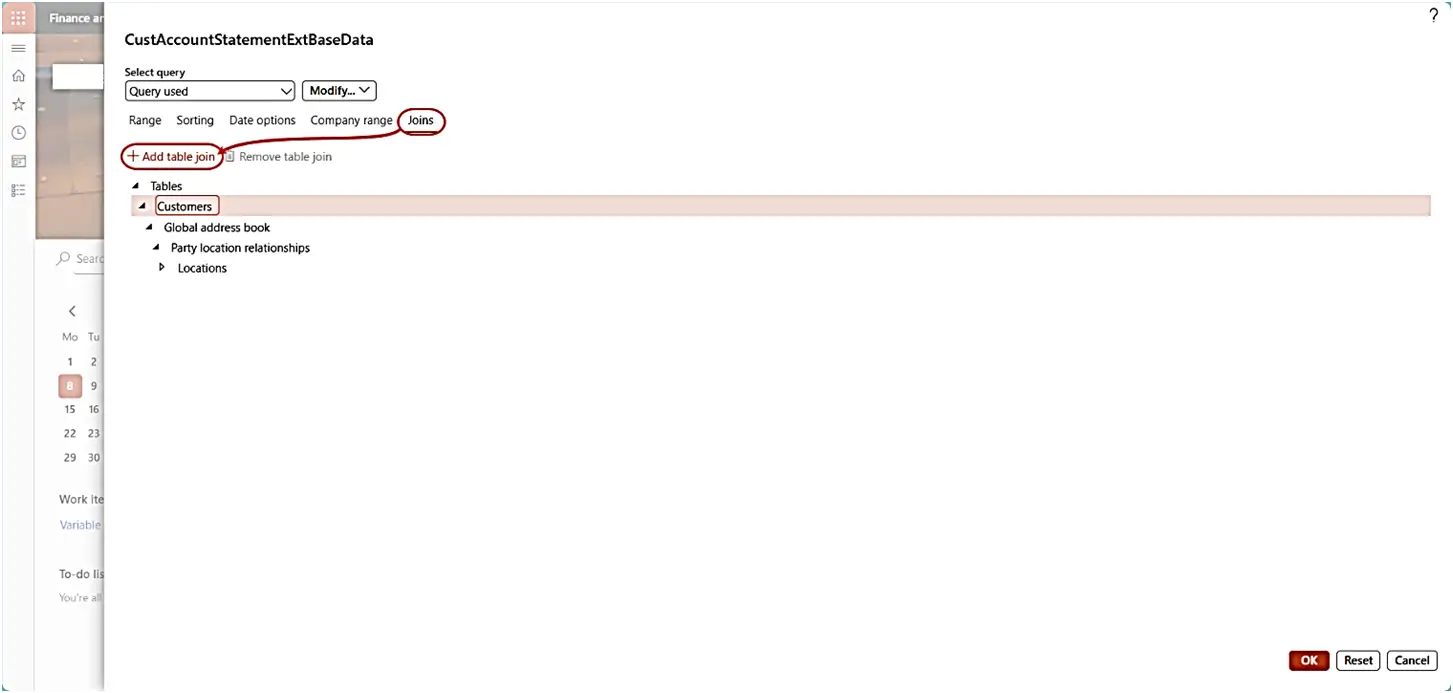
Advanced filter options provide more control over the filtering criteria to join additional tables.
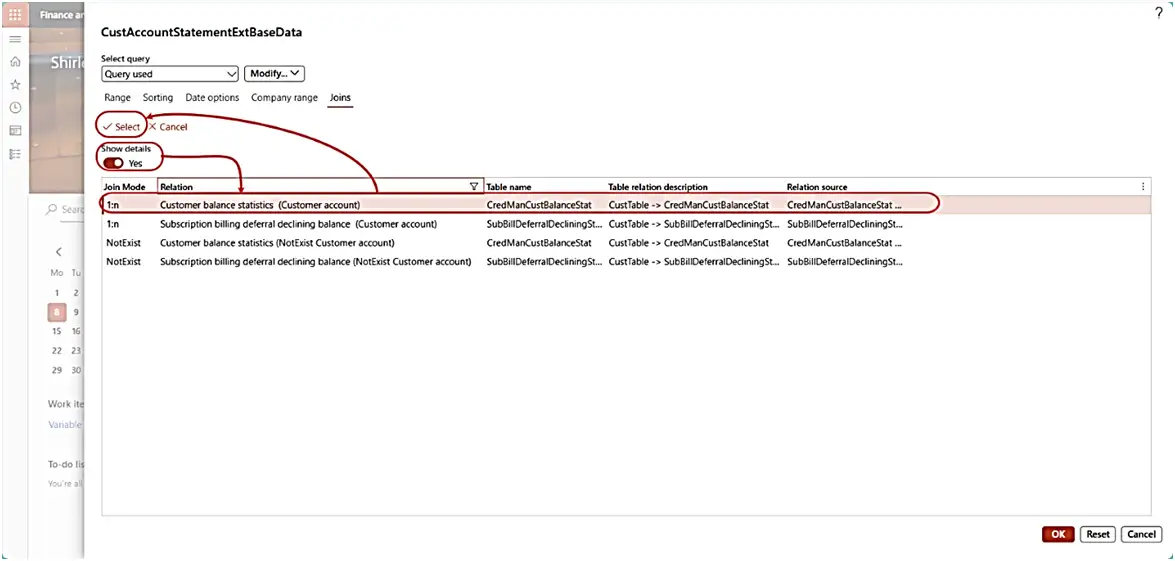
- In the filter header section, select the option for Joins.
Step-3: Add the Customer Balance Statistic Table
Joining the Customer Balance Statistic table allows for filtering based on balance criteria.
- Choose the Customer Balance Statistic table to join with the main customer table.
- Define the join conditions, typically by matching fields such as Customer ID from both tables.
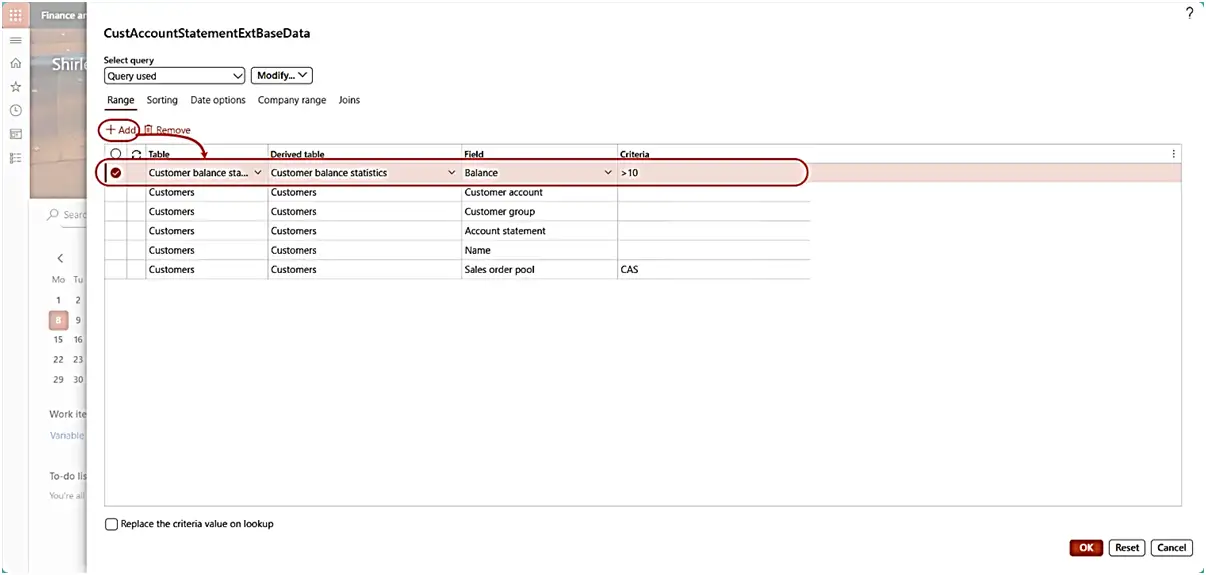
Step-4: Apply the Filter
Applying the filter narrows down the customer list to the desired subset.
- Apply the filter to narrow down the customer list to those with a balance greater than 10.
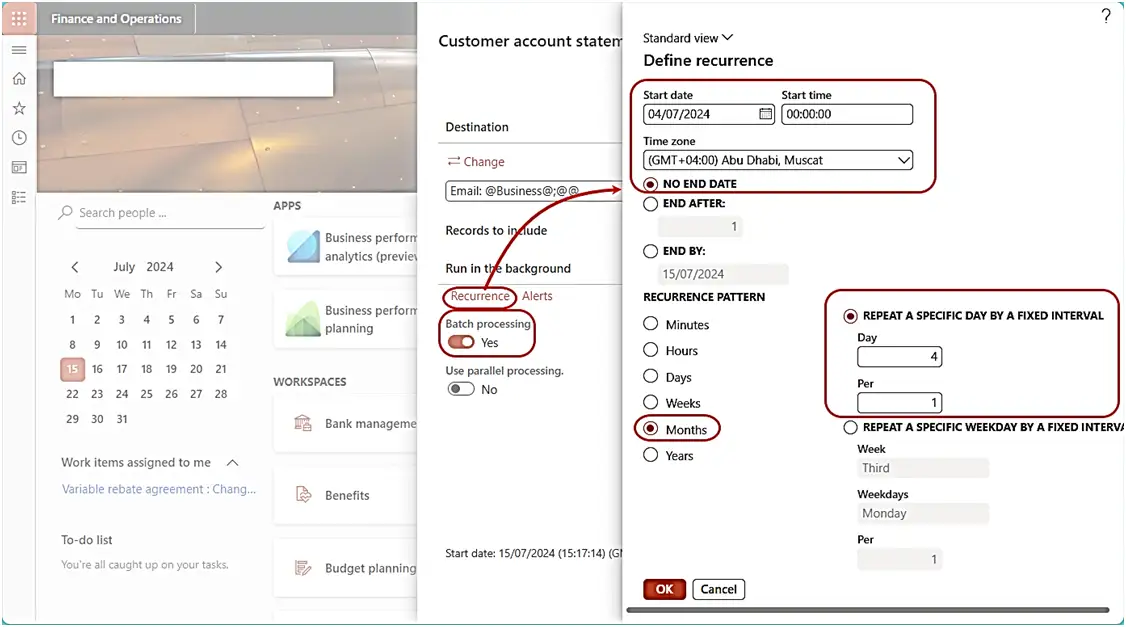
4.Enable Batch Job Parameters
Batch jobs automate the statement generation process, reducing manual intervention. Defining the parameters ensures the batch job runs according to the desired schedule.
- Define the job name and description.
- Set the batch job recurrence to Monthly.
- Select the start date and time for the batch job.
- Review the batch job settings to ensure everything is configured correctly.
5.Generate Statements
Generating the statements compiles the data according to the specified criteria.
- With the filter, date criteria applied, generate the customer statements in Batch.
- Review the statements to ensure they meet the specified criteria.
Conclusion
By following these steps, you can efficiently configure and send statement of accounts emails to customers using MS Dynamics 365 Finance and Operations. Utilizing the table-joined filter to include only those customers with a balance greater than 10 ensures that your communications are targeted and relevant. Additional configurations like setting up email parameters, creating sales order pools, configuring customer balance statistics, print management, and batch job settings enhance the process, making it more streamlined and effective.
If you have any questions or need further assistance, feel free to reach out to us. Happy accounting!


